top of page
  • Elizabeth House
  • Apr 27, 2022
  • 1 min read

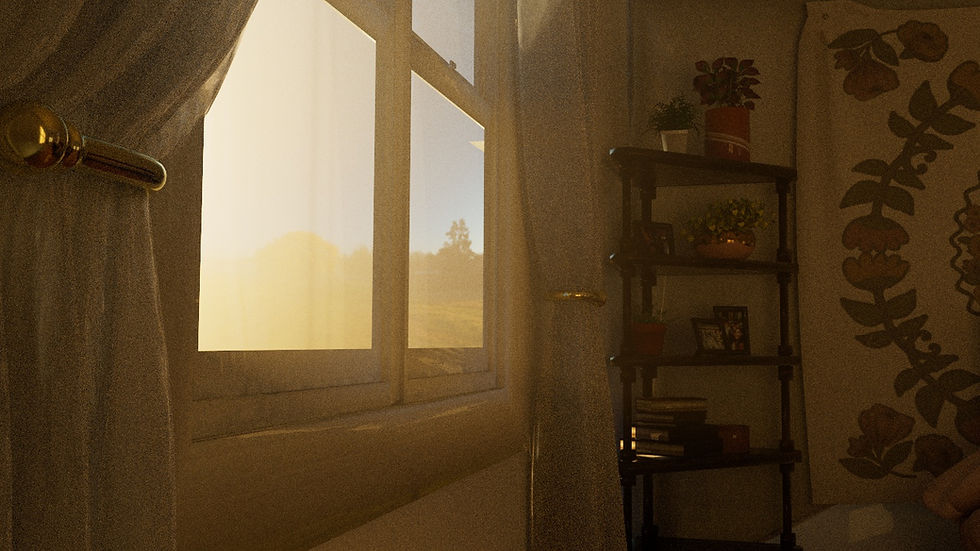
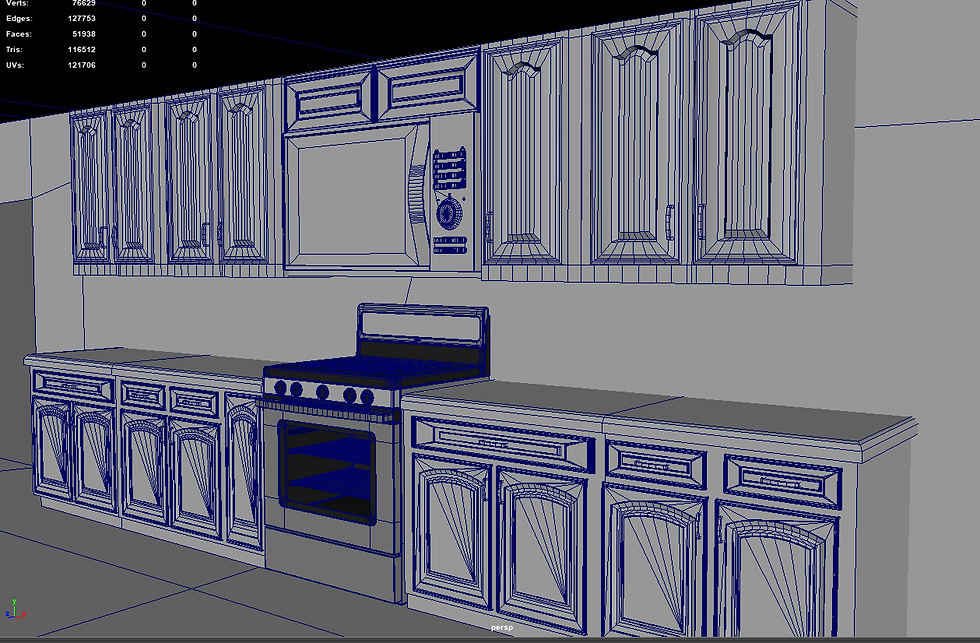
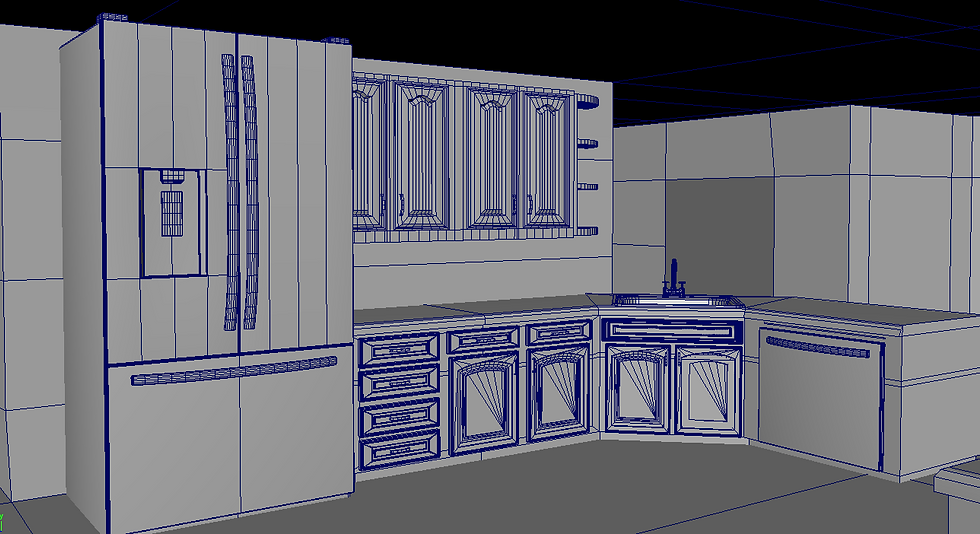
Over the weekend, I decided to fully flesh out the kitchen elements that the Rube Goldberg machine relies on or interacts with. This involved mainly cabinetry and countertops (just something a bit more detailed than the proxy geometry from last quarter. I also finished the overall layout of the lower floor so that the windows that provide supplemental lighting as the sequence moves downstairs are set in place. This will aid in the coming week/weekend when I continue lighting iterations.

ree

ree

ree

I obviously still need to put in a bit more detail in the background where the camera is, but I'm thinking (hoping) I can use cards with projected geometry and hide the fact that they are two-dimensional with depth of field.

I'm still texturing, but I've started moving forward in my sequence after adjusting the first two opening shots. There's still some discrepancies between lighting across shots; a lot of this was due to me finding a nice HDRi to use as the background that contributed a lot more to the overall lighting than I anticipated, but I'll continue to adjust that as I continue. I got the matchbox car textured, which I was really excited to tackle, and I'm happy with how it turned out. I also learned in that process that I can make brushes and texture maps in Photoshop and import them to use for height/normal maps which was really fun. Figuring that out really brought the back of the car to life I think.

ree

ree

ree

ree

ree

I'm also in the process of figuring out how to transfer updated UVs to my already cached geometry. The UV Transfer node from the gamedev toolset is looking the most promising. The only issue I've found with that is that the transforms on the source and target geometries have to match exactly, which is difficult to do with simulated objects. Regardless, I'm making progress. I shall continue marching forward.

  • Elizabeth House
  • Apr 13, 2022
  • 2 min read

I really wanted to fix the color discrepancies between my render view and my actual render from the farm before I moved any further with look development. I knew the issue was somewhere in the ACES to sRGB pipeline conversion, so I started working from there. After reading the documentation for it and testing out several different things in my Redshift ROP, I still was getting a washed out render, so I took my files into Nuke to see if I could have more control over the color space.

ree
Raw render

ree
View from render view

Once in Nuke, it was pretty simple to set my project settings to ACEScg, which is what Redshift in Houdini uses by default. Then, using an OCIO node, I transformed the color space to sRGB and wrote out an image sequence from Nuke as a .png sequence rather than .exr files. With this, I was able to match my render view to my renders from the farm (big shoutout and thanks to T'Naige and Michael for helping me figure this one out).


ree

ree

ree

I also did not know about using different color spaces for texture maps. There is an option to change this manually in each Redshift texture node, but there is also an option for using OCIO color rules in the Redshift render nodes, which automatically sets the correct color space for texture assets. So I turned this on as well.

ree

I got a lot of great feedback from my peers for the current state of my project, so I'm glad the color management problem was a fairly simple resolve. For more information and my own future reference, the Redshift documentation for color management in Houdini was quite useful as well as this blog which breaks down some of the quirks of working in ACES.

bottom of page