
Seashell Generator with VEX and VOPs
- Elizabeth House
- Jan 21, 2022
- 4 min read
This exercise was intended to explore the similarities and differences between using VEX snippets within a point wrangle and point VOPs within Houdini. To exemplify this, I made a seashell generator based on a formula for a helico spiral that Professor Fowler provided. She also provided a code block for VEX in which I interpreted into VOPs. The goal was to achieve an identical shell.


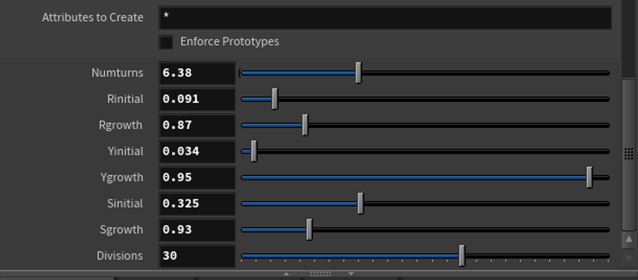
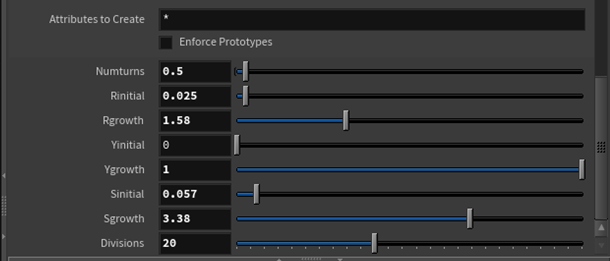
Both methods resulted in slider controls to easily create different types of shells by adjusting the parameters of the spiral. When parameters in both my VOPs and VEX containers matched values, the result was an identical shell.


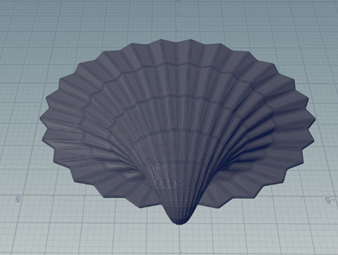
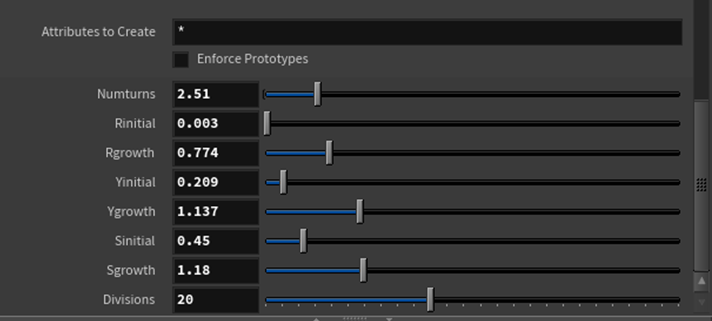
From here, I started experimenting with controls to try and replicate different types of shells.


I knew after achieving this that I wanted to take things a step further and create a miniature environment based on a jar of shells that I have in my room. I already had knowledge about how to run a rigid body simulation on the shells to get randomization and a natural stacked effect in the jar from a previous project, so I knew I would run into too much trouble. The main thing I wanted to do was use Redshift since I had never used it before.


My workflow (pictured above) for doing this was essentially giving each shell its own integer variant (shellVar) and copying them to points using a random function in a point wrangle and fitting the randomization range to only include the integers of the shell variants, in this case, fitting the range to be between zero and six so that every point would be assigned a shell. I also randomized the orientation of the shells and the scale (I fit the range of the scale as well so the size variation of the shells would not be so drastic). I then scattered points onto a box and used a points from volume node to achieve a more organic placement, and used the resulting point cloud to copy the shell geometry onto. This node has seed and point separation parameters which come in handy when using RBDs. In the copy to points node, I made sure to check on the piece attribute and match the name to shellVar to get the randomization to work, then I ran my sim.

Once I was happy with the simulation, I cached it out using a file cache node. The updated file cache node in Houdini 19 has options for incrementing/variations and automatically loads from disk once saved, which I found to be quite useful when updating or re-running my simulation.

Above is the result after caching out my simulation. Next was textures. I looked at several references both in person and online of seashells and what they looked like and decided to digitally paint my own tileable diffuse maps, which I did in Photoshop. I made six different variations.

I then brought these maps back into Houdini, and since I had UV’d my seashell models before caching my simulation, I was easily able to copy the textures onto the shells. The randomization, however, proved to be a challenge. I knew how to randomize textures using a string value in a material node. However, there was no parameter linked to the diffuse color in Redshift like there was in Mantra, which is what I was used to. Although it took a bit of time and research, I finally realized I could add a parameter within the mat network of my Redshift shader that linked an image file. I could name that parameter anything (I chose diffuse color) and reference it in my material node at the SOP level.


The original randomization of the textures resulted in a lot of neighboring shells having the same texture, so I wanted to change the seed. I didn’t quite know how to implement a parameter control inside a material node, so I just added an arbitrary value to the primitive number attribute inside the random function until I got a result I liked (in this case, 14.2).
Building the rest of the environment, I got a model online (cgtrader.com) for a windowsill and nightstand and wanted to use some bump maps on them. I had the shader network linked properly using an image file and displacement node and then connecting them to the displacement notch in the Redshift shader output, but still wasn’t seeing results. This is because displacement maps must be turned on in a specific Redshift tab at the top level geometry container. When I was working, there was no specific tab for Redshift, so I had to go to the Redshift dropdown menu at the top of the Houdini interface and click “Add OBJ Parameters” while the container was selected. I also had to do this with any camera node I used; the only different was clicking “Add Camera Parameters” instead.
From there, I decided to place one of each of my five shells out on the nightstand and slightly enlarge them so in the final render, the details of the ridges and the diffuse maps were a little more noticeable. Then, I set up my render cam.

One thing I really enjoyed about Redshift was the depth of field parameters on the camera plug in. Personally, I found that not using Houdini’s focus/fstop (checkbox) and using Reshift’s controls provided better results than Mantra/was more user friendly when defining DOF.

This was my final result! Using Redshift was definitely a journey, but even with high samples for glass and calculating the bump/displacement of the wood textures, this particular photo finished rendering in less than a minute, which is incredibly fast when compared to some past renders I’ve done in other engines. I also enjoyed getting back into VEX and finding new ways to accomplish the same task. If I were to revisit this, I would love to spend more time working on more specific maps for the shell roughness and bump maps, as well as continue experimenting with the shell geometry parameters to get even more types of shells.